Prompt
Template 1 of 3Redesign this craft room while preserving the visible envelope, fixed openings, camera position, and realistic scale. Use a calm contemporary direction with balanced materials, practical storage, and uncluttered circulation.
Make room for the materials and tools that define your creative work. Start with a photo to explore a craft room with a useful work surface, understandable storage and a considered lighting direction.
Show the room clearly, including the doors, windows and fixed features that should guide the concept.
Choose a style and lighting mood. Add the details you want to keep or change.
Review the credit cost, generate your concept and download a useful result.
Use this craft room design generator to explore a direction around your source image and these priorities. Focus on durable making surfaces, sorted, visible supply storage, shadow-free task lighting.
Cutting fabric, assembling models and packing handmade products need different amounts of uninterrupted surface.
Paper, fabric rolls, paint bottles and tiny findings do not belong in identical storage.
A making space often holds work between sessions.
Color can make a craft room inviting, but highly patterned surfaces may compete with the materials on the table.
Explain the largest piece you work on and whether you sit, stand or alternate. A small decorative desk may be unsuitable even if it makes the room look tidy.
Create my design conceptDescribe which supplies need to be visible, which should be grouped in drawers and which are used rarely. Clear storage categories make the generated arrangement more useful. You can then assess whether real containers and equipment would fit the proposed cabinets and shelves.
Create my design conceptAsk for a project tray area, a spare section of worktop or a dedicated shelf if that is part of your routine. Otherwise a perfectly cleared rendering may describe a room that only functions when nothing is being made.
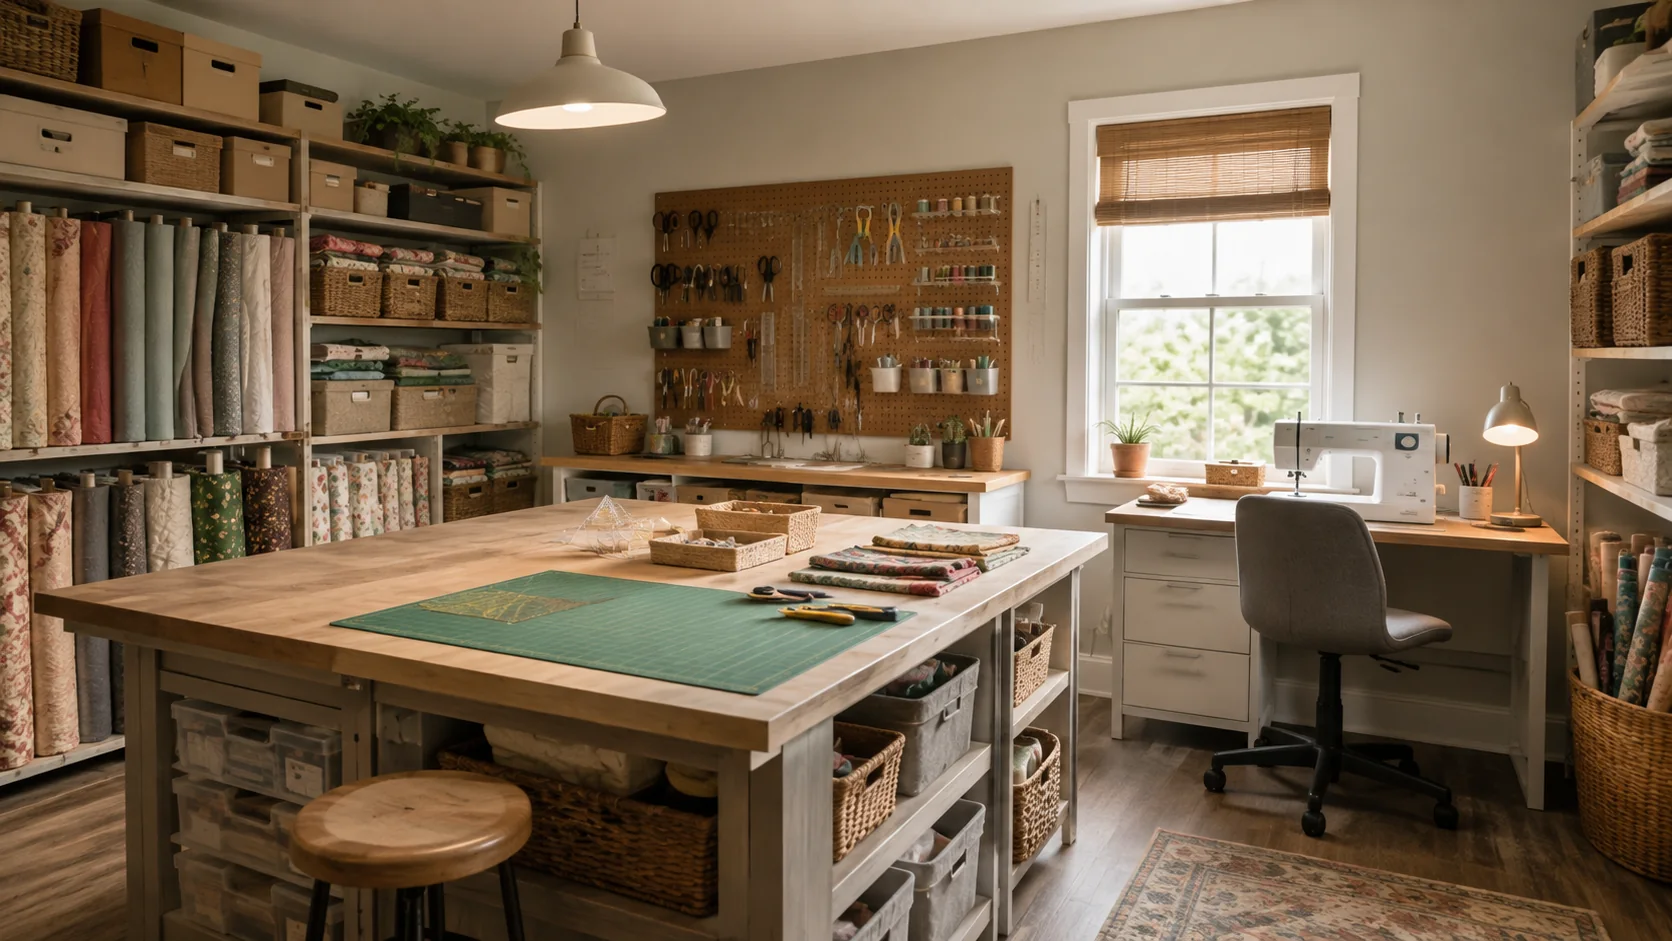
Create my design conceptA maker wants a permanent place for a sewing machine, folded fabric and projects waiting to be finished. The reference shows a spare room with a long wall and a window.
Keep one main direction per attempt so you can understand which change influenced the result. Inspect the completed concept against your original brief. Download a useful result, or change one requirement and generate another option for comparison.
Save notes on the finishes, furniture relationships and atmosphere you want to keep. Bring those notes, the concept and your actual measurements to the person helping you specify or implement the project.
Use the concept to compare the visual footprint of a central table and a longer wall workbench.
Consider how the main surface is restored for the next task without dismantling ongoing work.
Explore a quiet working background with accents in storage or textiles. Describe the need for focused task lighting rather than decorative brightness alone. The concept can suggest a position and visual style; test actual illumination, shadows and color perception at the work surface.
A useful brief compares a wall-based workbench with a separate cutting surface, keeping fabrics organized nearby. The image supports a decision about furniture arrangement before actual machine dimensions and working heights are checked.
Capture the longest work wall, available floor area, windows, outlets, and storage you already want to reuse.
Upload a JPG, PNG or WebP image up to 10 MB. Use a level photograph with readable detail; heavy filters and extreme wide-angle distortion can make the reference harder to interpret.
Name the crafts you practice, largest tools and materials, preferred working height, cleanup needs, and items that need child-safe storage. Replace the example details below with the facts of your own space.
Example brief: Create an organized sewing and paper-craft room from this photo. Keep the window and entry clear. Suggest a stable-looking machine workbench, a separate cutting surface if the room allows, shallow supply drawers and visible fabric storage. Include a place to set unfinished projects aside.
Use pale neutral work surfaces with cheerful storage accents and focused task-lighting cues instead of a decorative lounge setting.
Check the selected room type, choose a design style and set the lighting mood. Add your priorities in Custom Requirements, including retained furniture and fixed elements.
Choose from the available aspect ratios and output resolutions, then review the displayed credit cost before generating.
Confirm ventilation, tool clearances, electrical capacity, chemical storage, and wall fixing strength outside the generated concept.
Yes. List the activities in order of importance and identify the equipment that stays set up. Explain any cleanup or separation needs, such as keeping paper away from wet work. Review the generated arrangement against the real tools, ventilation needs and power provision before choosing furniture or deciding on permanent stations.
The reference and your requirements guide the design, but exact preservation is not guaranteed. Check windows, doors, fixed features and retained furniture against the original. If something important changes, revise the brief or take another reference photo before developing that option.
You receive a generated design image that you can review and download. It is a visual reference for your project, not an editable CAD drawing, an exact shopping list or a measured specification. Use completed results to develop and communicate your preferred direction.
No. Page imagery illustrates a possible design direction. Your result is generated from your own photo and requirements, so the pictured furniture and finishes are not a guaranteed outcome.

Bring the existing space and a focused brief together. Explore a visual direction you can review, refine and discuss before making the next project decision.
Create my design concept